 Try this styleon your selfie · free
Hollywood Waves With a Curling Iron on Long Straight Hair
Published October 29, 2026
Those glossy, uniform red-carpet waves are achievable at home with a curling iron, a comb, and one crucial brush-out step most people skip.
What Makes a Wave 'Hollywood'
Hollywood waves, sometimes called old-Hollywood or finger waves, are the polished, glamorous cousins of beachy waves: smooth, uniform, glossy S-shaped ridges that all flow in the same direction, usually swept to one side. They're the signature red-carpet look for a reason; they read elegant and intentional rather than tousled. Long straight hair is the ideal canvas because there's plenty of length to form deep, sweeping waves and the straightness gives you a clean slate. The defining features are uniformity, every wave the same size and direction, and shine, achieved through a smooth brush-out and finishing product. Unlike messy waves, there's no piecey texture here; it's all about that liquid, sculpted look. The technique uses a curling iron to build the curls, then a brush-out and clips to mold them into continuous ridges. It takes practice but the formula is consistent.
Prep Long Hair for Smooth, Lasting Waves
Start on clean, fully dry, straightened hair; any kink or bend will disrupt the uniform pattern, so blow it smooth or flat-iron first if needed. Long hair is heavy and curls drop under their own weight, so prep for hold. Mist a heat protectant throughout, then work a light mousse or a setting spray from roots to ends to give the waves staying power, this is essential on long hair, which falls fast. Comb everything to one side and decide your part; a deep side part is the most classic Hollywood choice and frames the face dramatically. Clip the hair you're not working on up and out of the way, and plan to work in clean, even one-to-two-inch sections. Even sections are the secret to uniform waves, so take your time dividing rather than grabbing random pieces.
Curling Technique for Uniform Direction
Use a one-to-one-and-a-quarter-inch curling iron for waves that are loose enough to brush out smoothly. The critical rule: curl every single section in the same direction, away from your face, so the waves all flow uniformly. Clamp near the root, wrap the section around the barrel, and hold for several seconds, keeping the iron horizontal so the curl forms a flat, even ribbon rather than a spiral. Don't curl the very ends; leave an inch or two straight for that classic vintage finish. As you release each curl, catch it in your palm and hold it cupped against your head until it cools completely, this sets the bend and is non-negotiable for hold. Even better, pin each cooled curl flat to your head with a duckbill clip and move on. Curl the entire head this way, every section the same direction, then let it all cool fully before the next step.
The Brush-Out That Creates the Ridges
This is the step that turns curls into Hollywood waves, and it's where most home attempts go wrong by skipping it. Once every curl is completely cool, unclip them all. Take a soft natural-bristle brush and brush through the entire length firmly, several passes, from roots to ends. The separate curls will blend and relax into smooth, connected waves. Now sculpt: with your hair brushed to one side, use your fingers or the spine of a comb to push the hair into defined S-ridges, and place a duckbill clip in the trough of each wave to hold the ridge while it sets. Let the clips stay for ten to fifteen minutes, then remove them and you'll have crisp, sculpted waves. Mist lightly with flexible hairspray before and after clipping to lock the ridges without stiffness.
Finishing for That Liquid Shine
Hollywood waves are defined by their glossy, almost wet-looking shine, so finishing matters as much as forming. After removing the setting clips, smooth a drop or two of lightweight hair oil or a shine serum over the surface with your palms, following the direction of the waves; don't rake through, which would disrupt the pattern, just glaze the top layer. A boar-bristle brush passed gently over the surface also boosts shine by smoothing the cuticle. Finish with a fine-mist shine spray or a light hairspray with a glossy finish. For the full red-carpet effect, tuck one side behind the ear or pin it back to show the sweep, and keep the ends sleek. If you have flyaways, a tiny bit of pomade smoothed over the crown tames them. The goal is a uniform, mirror-like surface where every wave catches the light.
Making Them Last and Previewing the Look
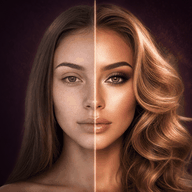
Long hair fights to fall straight, so protect your set. The cool-and-clip steps already build serious hold, but a flexible-hold spray seals the deal, and avoiding touch-ups with your fingers keeps the ridges crisp. In humidity, a stronger finishing spray and an anti-humidity product help the waves survive the evening. To extend them overnight, loosely pin the waves to your head, wrap in satin, and they'll be revivable the next morning with a quick mist. Because Hollywood waves are a commitment of time and technique, it's smart to make sure the look suits you before you start. You can preview glossy side-swept waves on your own selfie with GlowMaxing to test the part and direction against your face shape, then style with confidence knowing the deep side part and sweep will flatter you.
The quick checklist
- Start on fully dry, straightened hair with mousse or setting spray for hold
- Curl every section in the same direction, away from your face, for uniformity
- Keep the iron horizontal so curls form flat ribbons, not spirals
- Leave the last inch or two of the ends straight for the vintage finish
- Cool every curl in your palm or pinned flat before touching it
- Brush through fully with a natural-bristle brush to blend curls into waves
- Clip the wave troughs for ten to fifteen minutes to set the ridges
- Glaze the surface with a drop of oil or shine spray, following the wave direction